


Keeping Your Pup’s Ears Healthy
The Ultimate Guide to Dog Ear Cleaning: Keeping Your Pup’s Ears Healthy
Introduction
Dog ear cleaning is an essential part of pet grooming and overall health care. While many dog owners prioritize brushing, bathing, and nail trimming, ear hygiene is often overlooked. However, neglecting your dog’s ears can lead to infections, discomfort, and even hearing loss.
In this comprehensive guide, we’ll explore everything you need to know about dog ear cleaning, from why it’s important to how to do it safely at home. We’ll also cover signs of ear problems, the best products to use, and when to seek professional help.
Why Dog Ear Cleaning is Important
Dogs have unique ear structures that make them prone to wax buildup, dirt accumulation, and infections. Unlike human ears, which are relatively straight, a dog’s ear canal has an “L” shape. This structure helps protect the inner ear but also makes it easier for debris, moisture, and bacteria to get trapped inside.
Benefits of Regular Ear Cleaning:
✅ Prevents Infections: Bacteria and yeast thrive in dirty ears, leading to painful infections.
✅ Removes Excess Wax & Debris: Cleaning prevents buildup that can cause discomfort and hearing issues.
✅ Reduces Odors: Dirty ears can emit a strong, unpleasant smell due to bacterial overgrowth.
✅ Enhances Comfort: Dogs with clean ears feel better and are less likely to scratch or shake their heads.
✅ Early Detection of Health Issues: Routine ear checks help you spot infections, mites, or allergies before they become serious.
How Often Should You Clean Your Dog’s Ears?
Not all dogs require frequent ear cleanings. Some breeds, especially those with floppy ears, long hair, or allergies, need more regular maintenance than others.
General Guidelines:
- Floppy-eared breeds (e.g., Cocker Spaniels, Basset Hounds, Labradors): Clean every 1-2 weeks
- Breeds with upright ears (e.g., German Shepherds, Huskies, Chihuahuas): Clean once a month or as needed
- Dogs prone to ear infections (e.g., Poodles, Bulldogs, Retrievers): Clean weekly or as advised by a vet
- Low-maintenance breeds (e.g., Greyhounds, Beagles): Clean as needed, usually once a month
👉 Tip: Over-cleaning can irritate the ear canal, so it’s best to clean only when necessary.
Signs Your Dog’s Ears Need Cleaning
Dogs communicate discomfort in various ways. If you notice any of these signs, it may be time for an ear cleaning:
🔹 Excessive scratching or rubbing ears against furniture
🔹 Frequent head shaking or tilting
🔹 A strong, unpleasant odor coming from the ears
🔹 Visible wax buildup or debris inside the ear
🔹 Redness, swelling, or sensitivity when touched
🔹 Discharge (brown, yellow, or black)
🔹 Whining or discomfort when ears are touched
If your dog’s ears are inflamed, have a foul smell, or are producing pus-like discharge, it may be a sign of an infection. In this case, consult your veterinarian before cleaning.
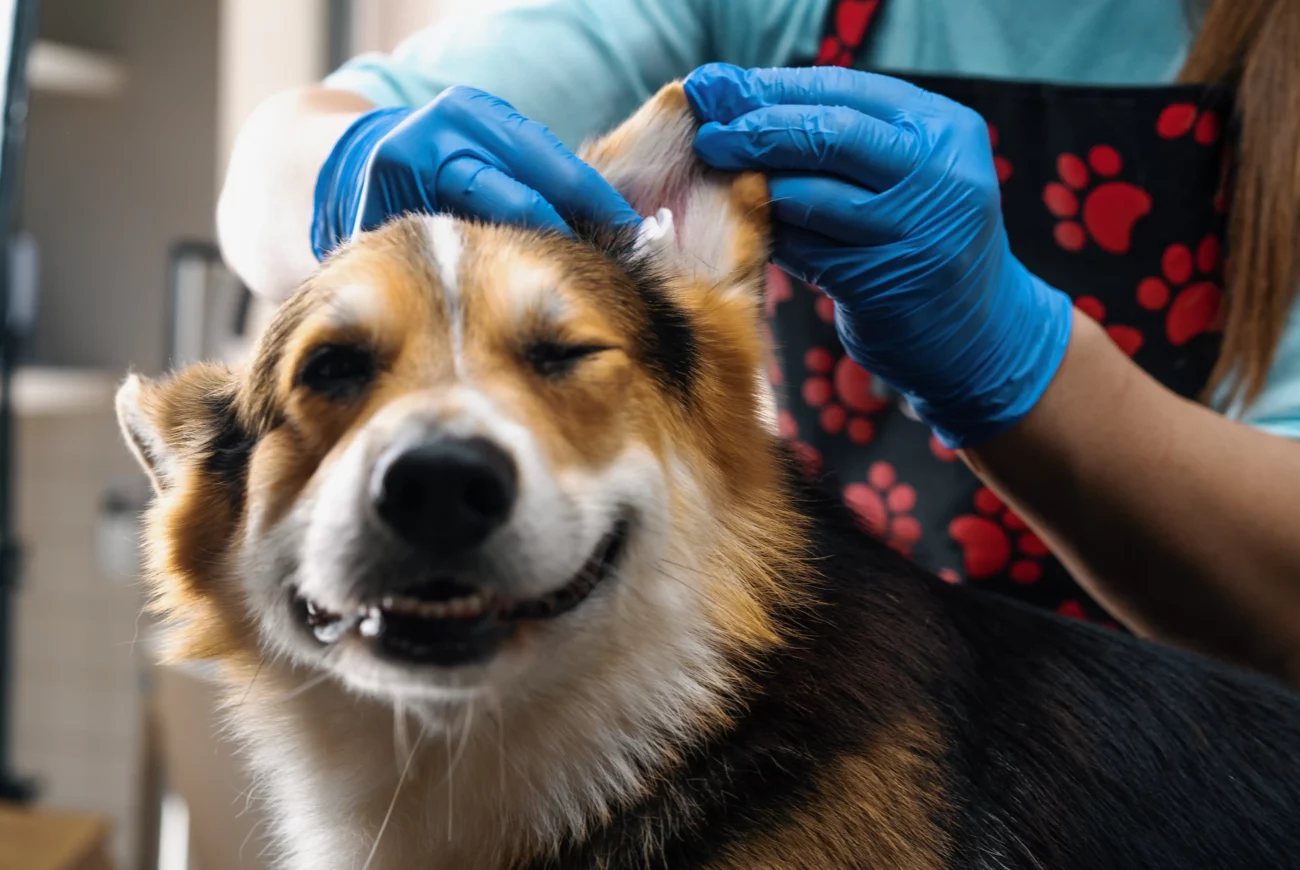
Step-by-Step Guide to Cleaning Your Dog’s Ears
Cleaning your dog’s ears at home is simple if you follow the right steps and use the correct products.
What You’ll Need:
✔️ Vet-approved ear cleaning solution
✔️ Cotton balls or gauze (avoid cotton swabs, as they can push debris deeper)
✔️ A clean towel
✔️ Treats for positive reinforcement
Step 1: Prepare Your Dog
Find a quiet, comfortable space where you can clean your dog’s ears without distractions. If your dog is anxious, have treats on hand to reward good behavior.
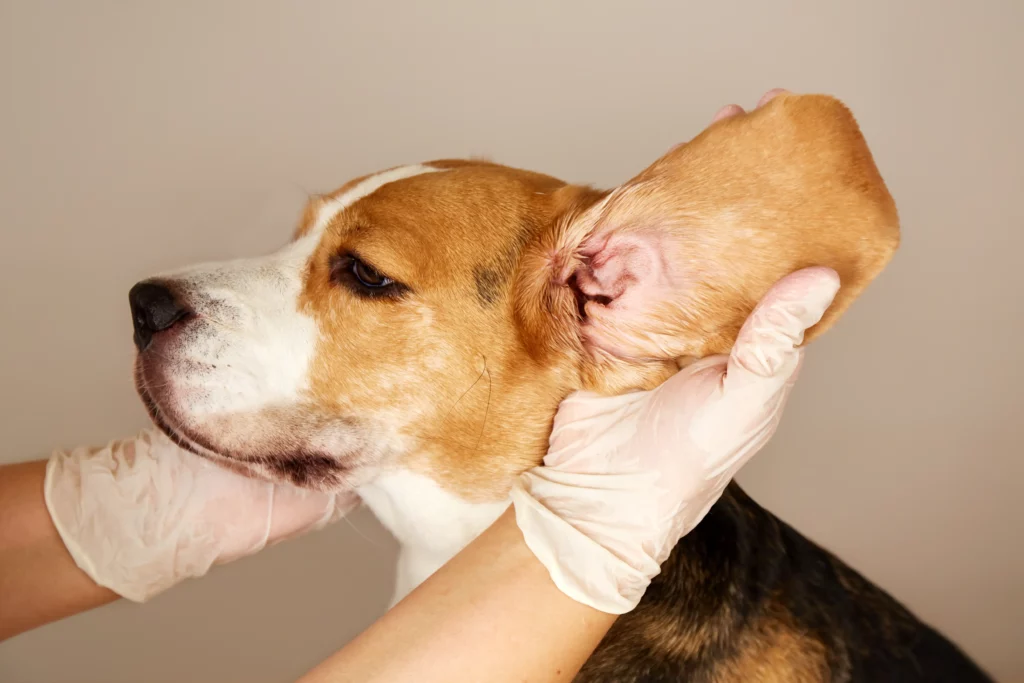
Step 2: Inspect the Ears
Before applying any cleaning solution, gently inspect your dog’s ears for redness, swelling, foul odor, or discharge. If you notice signs of infection, consult a vet instead of proceeding with cleaning.
Step 3: Apply the Ear Cleaner
- Hold the ear flap up to expose the ear canal.
- Squeeze a few drops of the cleaning solution into the ear (follow the instructions on the bottle).
- Gently massage the base of the ear for about 30 seconds to help break down wax and debris.
Step 4: Let Your Dog Shake
Dogs naturally shake their heads to remove excess liquid and loosened debris. Let your pup shake after applying the cleaner—it’s part of the process!
Step 5: Wipe Away Debris
- Use a cotton ball or gauze pad to gently wipe out any remaining wax or dirt from the outer ear canal.
- Avoid inserting anything deep into the ear canal, as this can cause damage.
Step 6: Reward Your Dog
After cleaning, praise your dog and offer a treat. This reinforces positive behavior and makes future cleanings easier.
Best Dog Ear Cleaning Solutions & Products
Choosing the right products is essential for safe and effective ear cleaning. Here are some vet-recommended options:
Top Ear Cleaning Solutions:
🧴 Vet’s Best Ear Relief Wash & Dry – Natural formula with aloe and chamomile
🧴 Zymox Ear Solution – Contains hydrocortisone for soothing irritated ears
🧴 Virbac Epi-Otic Advanced Cleaner – Great for routine maintenance and preventing infections
🧴 EcoEars Natural Ear Cleaner – Alcohol-free and safe for sensitive ears
Avoid using:
🚫 Hydrogen peroxide (can be too harsh and cause irritation)
🚫 Alcohol (dries out the ear and can sting)
🚫 Water alone (traps bacteria and moisture inside the ear)
Common Ear Problems in Dogs
Even with regular cleaning, some dogs may develop ear issues. Here are the most common ear problems and their symptoms:
1. Ear Infections (Otitis Externa)
📌 Symptoms: Redness, swelling, foul odor, yellow/brown discharge, excessive scratching
📌 Causes: Bacteria, yeast overgrowth, allergies, moisture buildup
Treatment: Requires vet-prescribed medication (antibiotics or antifungal drops).
2. Ear Mites
📌 Symptoms: Intense itching, dark coffee-ground-like debris, head shaking
📌 Causes: Tiny parasites that infest the ear canal
Treatment: Veterinary-prescribed ear mite treatments and thorough ear cleaning.
3. Allergies
📌 Symptoms: Chronic ear infections, redness, itchiness
📌 Causes: Food or environmental allergies
Treatment: Identifying and managing allergens through diet or medication.
4. Aural Hematoma (Blood Pocket in Ear Flap)
📌 Symptoms: Swollen ear flap, tenderness
📌 Causes: Head shaking or scratching, causing blood vessels to rupture
Treatment: Draining by a veterinarian and addressing underlying ear issues.
When to See a Veterinarian
While regular ear cleaning helps prevent problems, some conditions require professional treatment. Contact your vet if:
⚠️ Your dog’s ears have a strong, foul odor
⚠️ There is excessive swelling or redness
⚠️ Your dog cries or yelps when ears are touched
⚠️ You notice dark brown, yellow, or pus-like discharge
⚠️ Your dog has recurrent ear infections
Final Thoughts
Keeping your dog’s ears clean is a crucial part of their overall health and well-being. Regular cleaning helps prevent infections, reduces discomfort, and keeps your pup happy. By following the proper techniques and using vet-approved products, you can safely maintain your dog’s ear hygiene at home.
Remember, every dog is different—some require frequent ear cleanings, while others may only need occasional maintenance. Always pay attention to signs of discomfort and consult your veterinarian if you suspect an issue.
A little ear care goes a long way in keeping your furry friend happy and healthy! 🐶💙